Sunday, February 26, 2012
Friday, February 10, 2012
Got a New Job!!
I get to quit my crappy job at PetsMart. That's the main point. I hated working there for the following reasons:

- Humiliating uniform: men's polo shirt, khaki pants that made my butt look like the size of Texas and were dirty within ten minutes of getting to work, and uncomfortable shoes
- Idiots: I worked in the fish department and had to explain to people why they couldn't put a fish which gets 24" into a gallon bowl, or why not feeding their hamster caused it to die.
- Jackass boss: I had a good relationship with my immediate supervisor, but the store manager was a jerk who liked to hover and get in my space. I finally told him off and he cut my hours in retribution. If I wasn't leaving I would probably sue.
- I CONSTANTLY smelled of fish tanks
- My coworkers didn't do their jobs, and when you don't do certain things like clean the filters on the fish tanks it makes it a really really gross mess for the next person.
I had applied for a desk job a few weeks ago, but I didn't get it, and I was pretty devastated. I couldn't bear staying at PetsMart any longer. However, I had also sent out applications for nanny jobs and one person replied almost immediately, and I got the job! Here's why it's awesome:
- He is super smart, not even two and knows colors and animals and all sorts of things
- His family is from India, which means they're Hindu, which means they're vegetarian, and he doesn't have those awful poops that kids get when they start to eat meat. You know what I mean.
- He doesn't like staying indoors watching TV all day so we get to go to Explora (the kids museum) and the zoo and aquarium and whatnot all the time
- I get to play all day and get PAID for it.
- Good mommy practice, plus when the time comes that we start having kids I won't need to make such a big job-or-family sacrifice, cause I'll be able to do both!
Woo!

Tuesday, February 7, 2012
Pressure Cooker Beef Stew
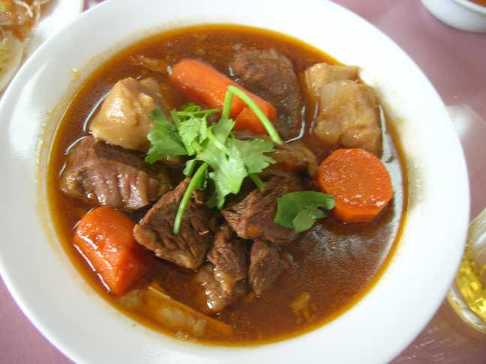
For the meat, you can use whatever cheap stew meat you like. I like the pre-cut stew meat that they have ready-packaged in the store, but if you like to buy your meat in bulk you can use some long-cooking meat like brisket or ribs. Believe me, you want a lot of collagen in there because that's what makes meat all tender and delicious when you cook it all day.
Ingredients
1 lb beef brisket, rib or plate, cut into 1" chunks
2-3 tbsp vegetable oil
12 oz beer (I like to use a wheat beer like Blue Moon. Just don't use any lite beer!)
2 c. water or beef stock/broth
1 large onion, chopped
2 cloves garlic, minced
1 c. carrots, peeled and cut into 1/2" pieces
1 1/2 c. RED potatoes, cut into 1" pieces (if you use the baking potatoes, they'll fall apart. Use waxy!)
1/4 tsp of each: thyme, sage, parsley (no rosemary, Garfunkel fans... it tastes a little woody)
salt and pepper
Directions
- Get out your pressure cooker (make sure to check the seals before you use it) and pour vegetable oil in the bottom, heating on medium until oil spits a little when you drop water on it.
- Sprinkle some salt on the meat and add to the pan, stirring until there's a nice brown sear on all or most of the meat. You can skip this if you're in a real hurry, but it's absolutely worth the extra flavor and deliciousness. The meat doesn't have to be fully cooked, just a little brown.
- Evacuate meat into a separate dish for a moment; you should have some nice crispy bits on the bottom after cooking. We'll use this, but first let's cook the onions.
- Add a little extra oil if you need to, and throw in the onions and garlic. You may want to turn the heat down a little; you want to caramelize the onions and garlic without having them burn.
- When the onions are a little brown and the garlic is soft, carefully pour in the beer and stir to get all the crispy bits off the bottom. Return beef to the pot, and add the herbs.
- Add beef stock or water. Pressure cookers can stew meat with only a little water, but we want to have a good amount of liquid for the other ingredients, which we'll add later.
- We're just cooking the beef for now, otherwise the veggies would get too soggy.
- According to your pressure cooker's instructions, close the cooker and bring up to pressure. Mine has two settings, high and low pressure. I like to use the low pressure setting, which will take about 45 minutes to finish cooking. You may have to just check your individual cooking times in your manual or online. Bring up to desired pressure and turn heat down just to keep a thin whistle coming out of the pot.
- Set a timer for 45 minutes, and check periodically to make sure that your pressure cooker is still letting a little steam out.
- After 45 minutes, turn off the heat and let the pressure release according to your instructions. When the pot unlocks, open and make sure the beef is super tender. After this much time it should fall apart pretty easily and the onions should be translucent and very soft.
- Take a taste of the broth and add salt/pepper if you like.
- Add carrots and potatoes and return lid to pressure cooker. Bring to low pressure and simmer for only five minutes, using the quick-release method to release the pressure. You really don't want these to overcook, I'm telling you.
- Check potatoes and carrots to make sure they're soft to your liking. If they're still a little crunchy, just cook the pot uncovered for another few minutes to soften them up. It's much better to undercook than overcook.
- Add a little fresh parsley just before serving to add some freshness to the dish, and serve with biscuits, cornbread, or over rice.
For the crockpot version, brown the meat and onions/garlic in a skillet until brown, add beer to deglaze and move the entire thing to your crock pot. Add liquid and cook on low for about six hours (or until the meat is nice and soft.) Add potatoes and carrots and cook for another two hours until those are soft, and enjoy!
OMNOMNOMNOM!!
Tax Refund = NEW STUFF!! :-D
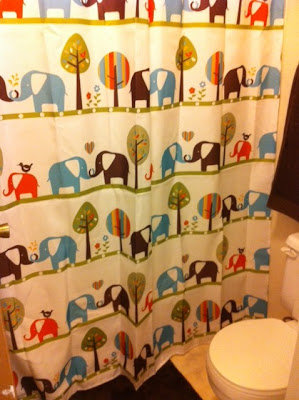
One of the perks of living in an apartment where you can't paint the walls is that it's really easy to change up the rooms without a lot of effort. Since I got a pretty legit tax refund this year I decided to redo our master bathroom and kitchen. Look, see!!
Bathroom (it used to be lavender and flowers, but I wanted something a little more fun.)

.JPG)
.JPG)
.JPG)
Bathroom (it used to be lavender and flowers, but I wanted something a little more fun.)


.JPG)
Kitchen: Lemons!
.JPG)
.JPG)
I know it's not that interesting, but I'm excited! Also I'm obsessed with kitchen linens, so I tend to buy them all the time and change it up a lot. Plus, OMG LOOK AT THE APRON!!!!
Sunday, February 5, 2012
I'll never be as good a cook as my mother-in-law, but here's me trying.

Since I married a Hispanic guy, I realized that I would have a lot to live up to, food-wise (his mom is an awesome cook). My first foray into Mexican cooking was charro beans, or cowboy beans to you whiteys. Traditionally they're just pinto beans stewed all day with onions, garlic, and bacon, but you can throw other meats or flavors in if you want, like jalapeno, cilantro, chorizo, etc. I'm not very adventurous so I tend to stick with the usual recipe and maybe throw some cilantro or something on at the very end.
Here's how to do it:
Ingredients
1/2 bag dry pinto beans (you can do it with a full bag, but my crock pot isn't that big.)
1 large onion, chopped
2-3 cloves garlic, minced
1/2 lb bacon, cut into bite-size pieces
1/4 lb other meat such as ham, chorizo, etc. (optional)
3-5 jalapenos (optional
Directions
1) You need to soak the dry beans, otherwise they can be kind of gross. Soaking them will get rid of any weird dirt or dust and make the cooking easier. You can do this either by throwing them in about 8 cups of cold water the night before and letting them soak overnight. The other way is to pour 8 cups of hot water over them and bring to a boil for about 2 minutes, then take them off the heat and allow them to sit for an hour or so. Either way works just fine. After soaking, they should get a little bigger and the skins peel off easily, and the water will be kind of a gross brown color. Drain and rinse REALLY WELL, then throw in your crock pot.
2) Brown bacon pieces in a skillet. I like to use the big packages of bacon ends and pieces (just the odd bits left over from cutting the slices) because it's super cheap and you get nice meaty pieces. You do have to pick through it sometimes to get the less fatty bits. You want to have a nice mixture of about 1/4 fatty pieces and 3/4 lean. Remove bacon into crock pot but leave about 1-2 tbsp of the grease in the pan.
3) Turn heat to med-low and throw in onion and garlic. You want to soften them just a bit and bring out the flavors, getting the garlic all nice and toasty. You can skip this step if you want, and throw the onions and garlic in as is, but I like to do it this way because it adds a little more flavor. Throw these in the crock pot with everything else. If you want to add cilantro or jalapenos, throw them in at this point.
4) When everything is in the crock pot, pour in water until all the solid material is covered by about an inch or so. You may have to add water if you get a lot of evaporation or if the beans absorb a lot of the water. For fast cooking turn to high for about six to eight hours; for slower (and slightly better tasting) cooking, put on low for about 10 hours. If you're doing fast cooking but not eating for a while, turn crock pot to low and simmer as long as you need. The longer the better, really, because as the starch leaks out of the beans they'll create a really nice sauce.
That's it! I love these beans plain, or rolled in a burrito with some rice and cheese, or as a side.
Enjoy!
Saturday, February 4, 2012
This is How I Coupon
Aside from watching British television shows and taking baths (usually at the same time), couponing is one of my favorite things. I'm not to the point where I can save more than 50% on a grocery trip, but I get a fuzzy feeling when I save dollars. Cause I don't have a lot of dollars and I need to save them.
There are a lot of couponing blogs/sites that are super awesome, and I've shamelessly stolen ideas from all of them to make my own system.
Step 1: Make a menu
I catch a lot of crap for this, because I have a weekly dinner menu posted next to the kitchen. This isn't anything fancy; I would absolutely die if I had to cook a full fancy meal every night. My husband and I have weird schedules that don't even allow us to be together in the evening to have dinner anyway. I look at both of our schedules for the week and figure out what nights we're both home, one is home, etc. and make a "What's for Dinner" list every Sunday (that's usually the day I go to the store). I look through the weekly circular at our local grocery store (Smith’s) and figure out if anything awesome is on sale like pork chops or hot dogs or frozen potatoes or whatever. If, say, bacon and ham are both on sale, I’ll make split pea soup or charro beans that week. Here's an example:
Sunday (both are home):
- · Pressure cooker beef stew
- · Corn bread
Monday (Husband is home, I get home at 6:00 pm)
- · Hot dogs
- · Chips
Tuesday (I’m home, but hubby works at 5:00 pm. I usually make something that makes good leftovers so he can take some for his lunch)
- · Chicken pasta bake
- · Frozen veggies
Wednesday (Both home)
- · Split pea soup
- · Homemade bread (I am obsessed with my breadmaker so I usually have some sort of homemade bread around)
Thursday (Both working)
- · Scrounge (usually frozen pizza, hamburger helper or something quick, even fast food rarely)
Friday:
- · Date Night!
Saturday (Hubby works, I close, I’ll put something in the crock pot for the evening like soup or beans)
- · Soft tacos
- · Spanish rice
- · Charro beans
The key to this system is that I’m flexible. If we decide that we would rather go out to eat on Tuesday night or something, we just move the days around. This is just so that I have a preliminary shopping list to make sure that I don’t get a bunch of stuff I don’t need. I make sure to do it on my computer so that if I find a coupon for something awesome I can add it in or change dinner plans around.
Step 2: Feed the Book
There are a zillion ways of keeping track of coupons, and I’ve probably tried all of them. Problem is, I’m not organized enough that I can keep track of individual circulars and track down a coupon I need. My solution is to put all my coupons in a binder with baseball card holders to keep them organized.
To start, I make sure to pick up a paper every Sunday. More serious couponers will get them delivered, like six or eight copies or something, to get a ton of coupons. I don’t think it’s worth it, because my grocery store isn’t great about doubling coupons anyway. One is fine for me, and saves me some dollars.
When I get home, I pull out all the circulars for the stores I like, as well as the coupon circulars. I usually grab the Target and Walgreens circulars to see if anything is on sale, and then get the SmartSource circular and the P&G Brand Saver circular (which only comes once or twice a month). The Red Plum circular usually comes in my mailbox in the middle of the week; I just hang on to it.
Some people like to pull out all the coupons and save them for a rainy day. I think this is stupid, because I honestly don’t see why I would need to save $.50 on a tube of denture toothpaste. This was my first mistake of couponing; I would buy needless stuff simply because it was cheap. What I do now is only clip the coupons that I would need and chuck the rest. If I’ve never used panko breadcrumbs, I don’t really need to save $.30 on them.
The other awesome place to get coupons is couponmom.com. I love this site for other reasons, but mostly because it’s got a link to printable coupons. You just click the ones you like and print. It’s a little expensive on ink if you do it a lot, but you can get a lot of good stuff that way.
When I pick out the coupons I like, I sort them into categories:
* Food
* Cleaning
* Pet care (I have two kitties, and food/litter are expensive!)
* Personal/Meds
* Restaurant (There is at least one in every Red Plum circular each week.)
Next, I put the coupons for each product in an individual slot in the baseball card holders. If I have multiple coupons for a single product, I’ll stick them together. I try to keep it sort of organized, keeping the Pillsbury stuff, dairy, meat, frozen, etc. stuff together. The larger categories are divided by regular dividers with labels on them.

Step 4: CouponMom.com
I LOVE this site. First, for the printable coupons, which are super cool. Second, it’s a database of all the sales at the store of your choice (you choose by the state and then pick what store you like) and what coupons are available for those items. It then has a total discount, so you can see how much you’re saving.
I don’t really use this precisely as they instruct you to, but it’s a good guideline. I go down the list and click the things that I need, and it will tell me if it’s A) on sale at Smith’s, B) If there’s a coupon, or C)Both of them. The best thing is when you can use a coupon when something’s already on sale. It’s a super cool guideline.

Step 5: Make the List
When I spend this much time working on coupons, I want to make sure I’m getting the most for my money and my time. When I make my list, I use all the above steps to make sure I get the best deal on the things I need, and only actually getting the things I need.
The list has 5 columns:
- · Actual cost
- · Item
- · Deal
- · Coupon
- · Stipulation
2/5/2012 | ||||
Actual Cost | Item | Deal | Coupon | Stipulation |
Mountain dairy milk | 2/$5 | |||
Pinto beans | $.40/each | |||
Crescent rolls | 3/$5 (Buy 10 deal) | $0.40 | Buy 2 | |
Kroger yogurt | 10/$4 | $.10/$.10 | Buy 5 | |
Kroger soda | $2.25 | Buy 2 | ||
I leave the actual cost blank to put in the price that I find at the store (more on that later). The second column is the actual list, based off of the good things on sale, the stuff I need for my weekly menu, and other random odds and ends that we need. If there’s a particular sale or I have a coupon for a particular brand, I write the brand name, but if it’s just a normal thing I need then I’ll leave it off.
The next column is the sale price. I really hate paying full price for anything, so I like to have this completely full. I write the sale price or if there’s a special promotion (like save $10 on 10 participating items or something).
The coupon column is about, big surprise, the coupons. I go through my coupon binder and find the coupons that I can use. If I have more than one, I put all of them on the line.
The final column is the stipulation. This can be of the sale, of the coupon, or however many I need to buy. If I have two coupons for crescent rolls, one $1.00 off four and one for $.75 off of two, I put that I need four of them. Always stipulate the largest amount so that you don’t get screwed at the register.
I always throw a few extra empty lines at the bottom for last minute or impulse items. I try to stay away from the impulse stuff, but if I realize we need cat food I can throw it on there to keep track of what’s in my cart.
Which brings me to the final part:
Step 5: SHOPPING!
I have a couple specialized items for my shopping trips.
- · Reusable bags (they carry more stuff, I don’t care that they’re better for the earth)
- · Coupon book (it’s just a rigid little folder I have with two pockets and a pen slot to keep me organized
- · Shopping list
- · Necessary coupons
- · Pen
I always try to eat before I go to the store, because I’m really impulsive and will buy a crate of gummy bears just because I’m hungry. I always shop at the same store, simply because I know where everything is and it makes me wander through unnecessary aisles much less. I also prefer to go with my husband, because he can push the cart and I can pick out the things I need.
When I pick stuff out, I go off my list almost entirely. Since I have all the deals and coupons, I can compare the price that I’ll save versus, say, a generic version or something. Just because I have a coupon doesn’t make it cheaper. I am pretty flexible as to different brands, so I can save much more money buy just going generic. After every item, I write the price down in the empty column to keep track of what I’ve gotten and how much we’re paying (I write down the sticker price and just leave the coupons for the end).
When I’ve gotten everything I need, I’ll go to a relatively quiet place in the store and quickly add up the prices (makes it much easier than trying to juggle a phone or calculator while you’re shopping). Since I don’t count in the coupons, I make sure I’m under budget before I reach the register, just in case some of my coupons don’t work.
At the register, I make sure to group my stuff so that it’s easier to unload when I get home, but that’s just me being OCD. I don’t freak out if my coupons don’t work either; by making sure I was under budget before I even went to the register I can make sure that I’m not going to get screwed over. The money saved is just icing on the cake.

And that’s it! It’s a bit of a complicated process when I put it down on paper, but honestly it only takes me about an hour to get everything done and then go shopping. I think saving $20-$30 per shopping trip for an hour of work is pretty good.
I hope this has been somewhat informative if you’re interested in starting to coupon, since it took me a while to find a good system and can be frustrating at times. Keep with it though, cause it’s totally worth it.
The Best Cupcake Ideas I've Ever Seen
Doctor Who

Harry Potter

Lord of the Rings

A Song of Ice and Fire

Really bringing out my inner nerd today.
Super Bowl Party Snack
So I should start by saying that I couldn't give two sh*ts about the Super Bowl, or football or any sports in general, but I like going to parties and I LOVE making food for my friends. I found a genius recipe that I'm taking.
CORNDOG MINI MUFFINS!!
Cornbread Mix:


And here's where I found the recipe.
http://happygoodtime.com/2012/02/01/corn-dog-mini-muffins/
These were so freaking amazing, and probably a little healthier than regular corn dogs since they weren't fried or anything. Enjoy!
CORNDOG MINI MUFFINS!!
Cornbread Mix:
- 1 cup all purpose flour
- 1 cup cornmeal
- 1 tablespoon baking powder
- 2 eggs
- 1 cup milk
- 1/3 cup vegetable oil
- 1/4 cup sugar
- 1/2 teaspoon salt
DIRECTIONS:
- Pre-heat your oven to 400 degrees F
- In a large mixing bowl stir together flour, cornmeal, salt, and baking powder
- In a separate bowl whisk together eggs, milk, applesauce and sugar
- Gently mix together wet and dry ingredients, stirring only to coat. Be careful not to over mix here or you will have tough, dry muffins. Just like with biscuits/scones the key is to be gentle with the batter. There will be small lumps in your batter, and that is perfectly fine.
- Prepare your muffin tin by spraying liberally with cooking spray. If your pan has the tendency to stick, consider using mini muffin liners.
- Using a tablespoon, fill each muffin cup 3/4 full. Be sure not to fill all the way to the top.
- Insert 1 hot dog piece into each muffin
- I used Lit'l Smokies mini smoked sausages, but you can use regular cut up hot dogs. Whichever sort you like, just make sure they're fully cooked.
- Bake at 400 F in the center of your oven for 15 minutes or until a toothpick inserted in the middle of a muffin comes out clean
- Remove from pan while still very warm to avoid over-cooking
Here's what they're supposed to look like:

And here's what mine looked like (I think they look a little like boobies...):
And here's where I found the recipe.
http://happygoodtime.com/2012/02/01/corn-dog-mini-muffins/
These were so freaking amazing, and probably a little healthier than regular corn dogs since they weren't fried or anything. Enjoy!
Subscribe to:
Posts (Atom)